
Use this guide to install and get started using our Windows driving range app.
Not applicable to Mac users.
-
Click this link to get started - Download
When you click Download, you will most likely be met by this message:
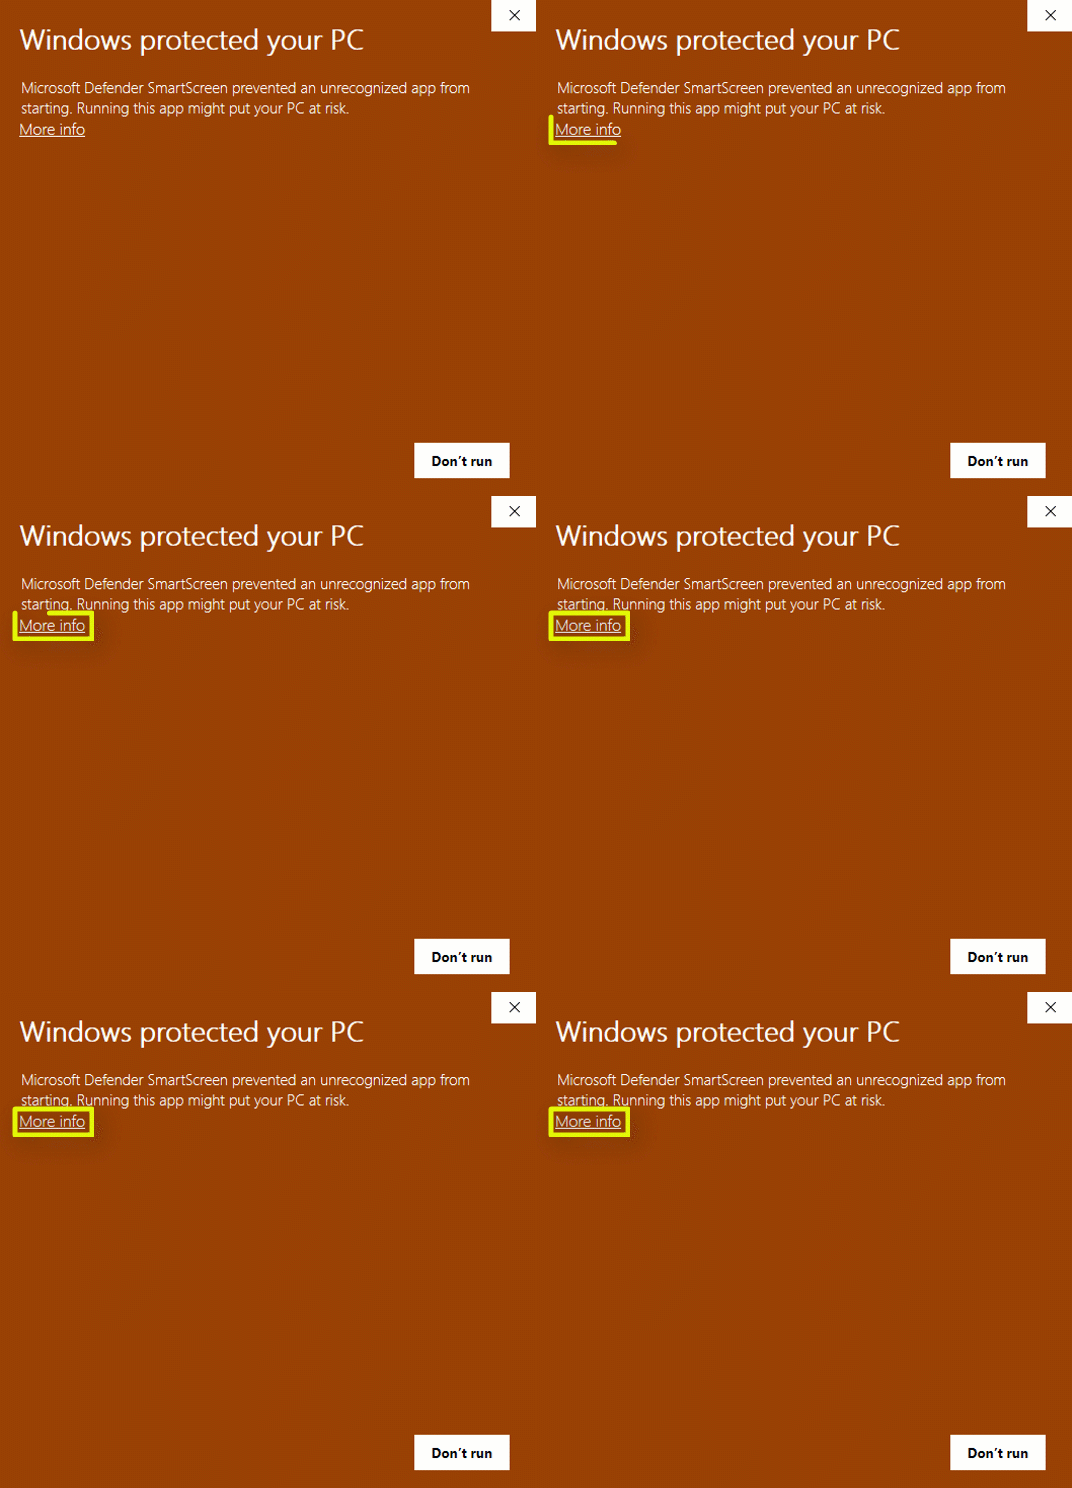
The application is completely safe, so to continue, click 'more info'
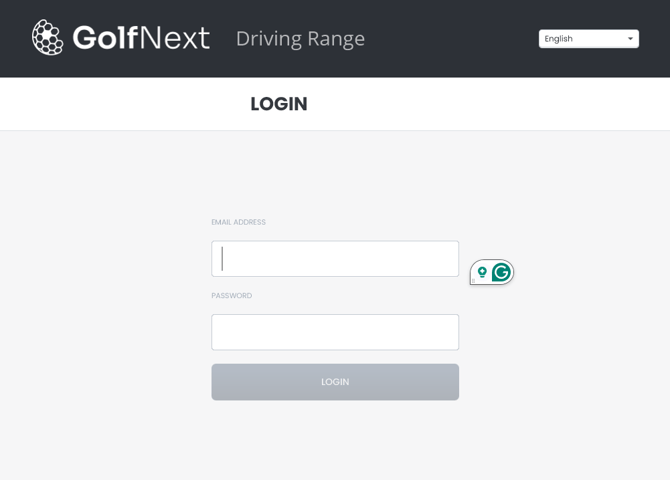
When the download is complete and you have installed the program, you can log in the same way you do in admin.golfnext.com
If nessecary, you can change the language in the top right hand corner
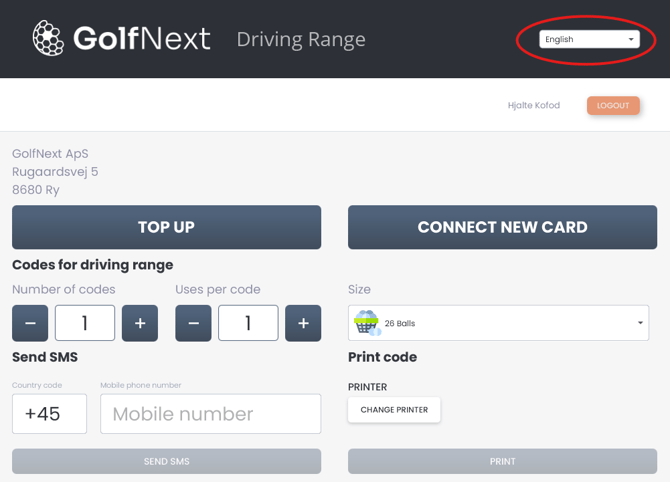
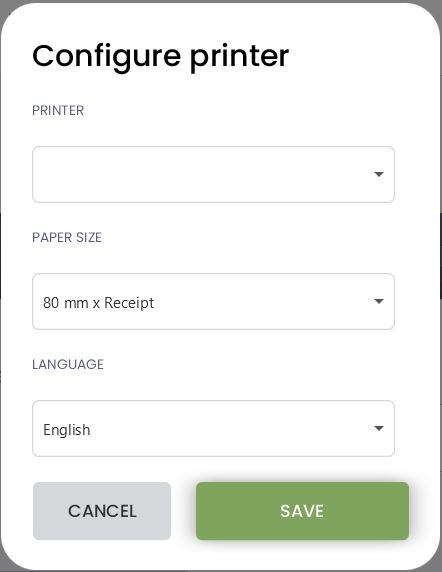
Click 'Change Printer' in case you have a recipt printer connected to the network
-
Under "Printer" you should choose your receipt printer.
-
Under "Paper Size" you should choose the paper size of your chose receipt printer.
-
Under "Language" you should choose the language that gets printed on your vouchers.
-
Click "Save" when done.
-
Good job! The setup is now done. Now, I will show you how to use the software.
I will start up by showing you how to give out codes for the driving range.
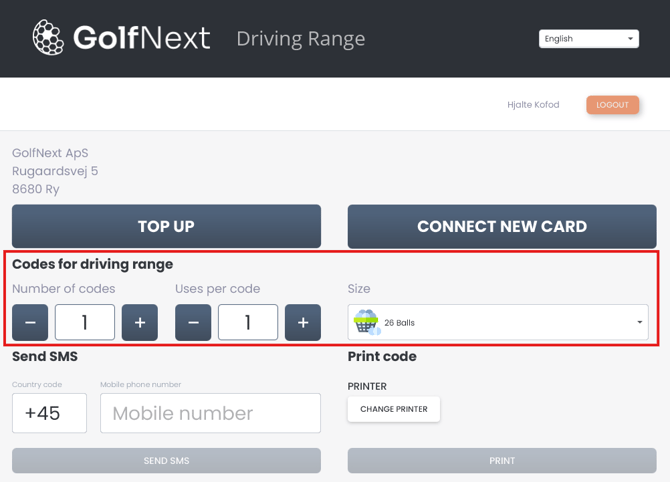
In this section, you can choose the settings for giving out codes.
Starting from the left;
"Number of codes" decides how many codes you make.
"Uses per code" decides how many uses each code has.
"Size" Decides how big a bucket each use of the code gives. There are a few different "sizes" to choose from.
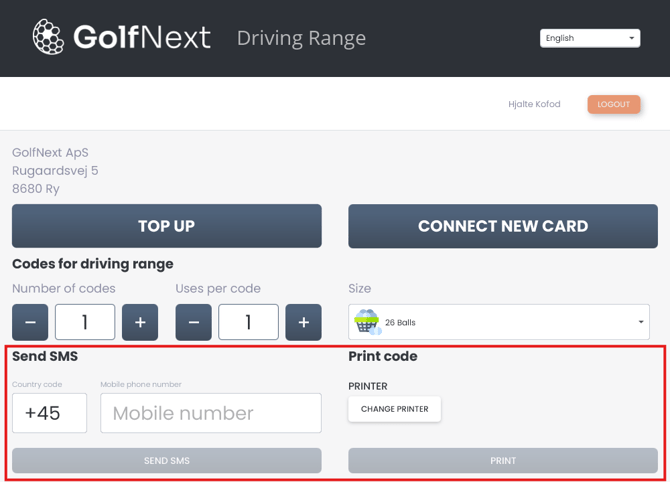
You can now choose how you want to hand out the codes; you have two options:
"Send SMS". Enter the recipient's phone number in the box and press "Send SMS"; the recipient will receive an SMS with the codes.
"Print code" Simply press print, and your chosen receipt printer will print out the codes, which you can then hand out to your customer.
If instead of giving out codes, you want to give the money to use on a card or through the GolfNext app, you have two options:
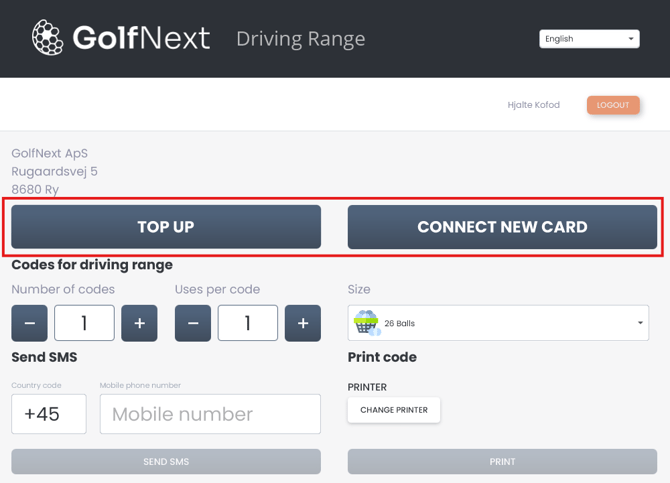
"Top Up" can be used if the customer can check off one of the following requirements:
- Has a GolfNext account
- Has a Driving Range card
Otherwise, if you want to give a new card to the customer, press "Connect New Card"
In this section, we will show you how "Top Up" works.
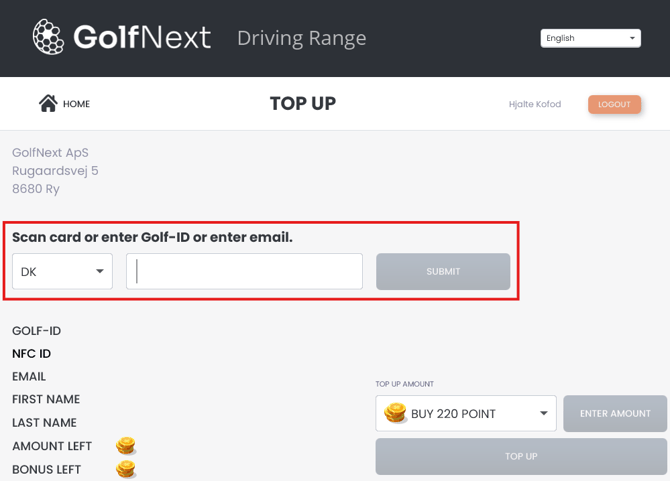
In the highlighted part, choose the customer's country, then either scan their Driving Range/Golf Federation card, enter their Golf-ID or email.
Press "Submit"
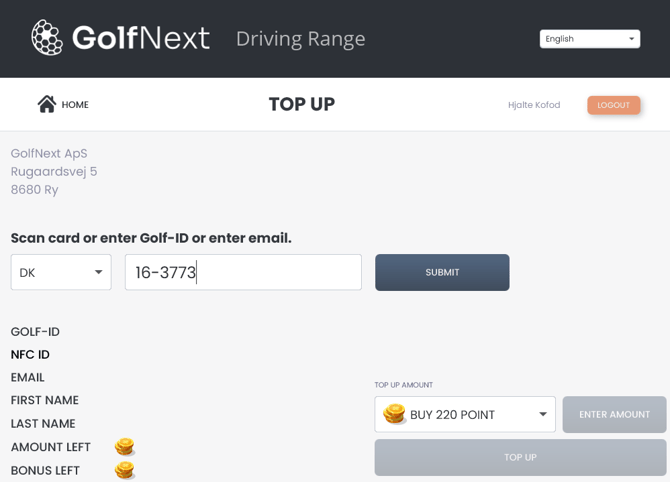
After entering or scanning, the screen should look like this, where you can, among other things, check the amount of money left on the customer's account.
"NFC ID" will be empty, as shown above, if the customer doesn't have a card attributed to them yet.
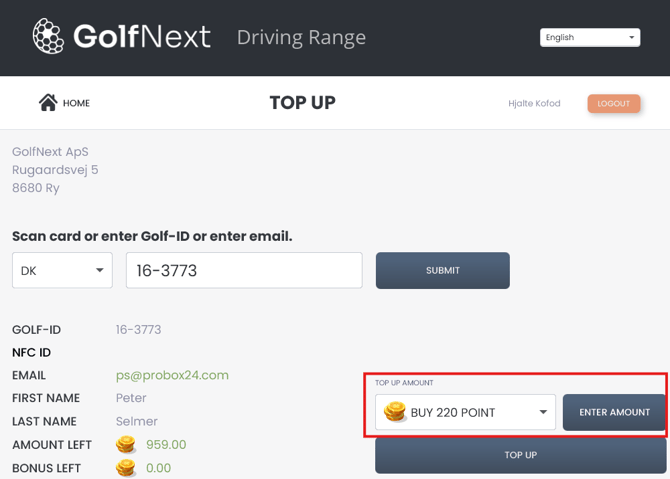
Now you can choose the amount you want to add to the customer's account. If you click the dropdown menu, you can choose from a list of pre-defined amounts.
Otherwise, you can press "Enter Amount" and choose a specified amount. This will often be useful if you are importing a customer from another system who has a certain amount left from his old account.
The "Enter Amount" feature is also useful if you accidentally gave the customer too much ball money, simply enter a negative amount, and that amount will be deducted from the customer's account.
Press "Top Up" when you have chosen the correct amount.
Now, I'll show you how to connect a new card.
First. Press "Connect New Card" on the front page.
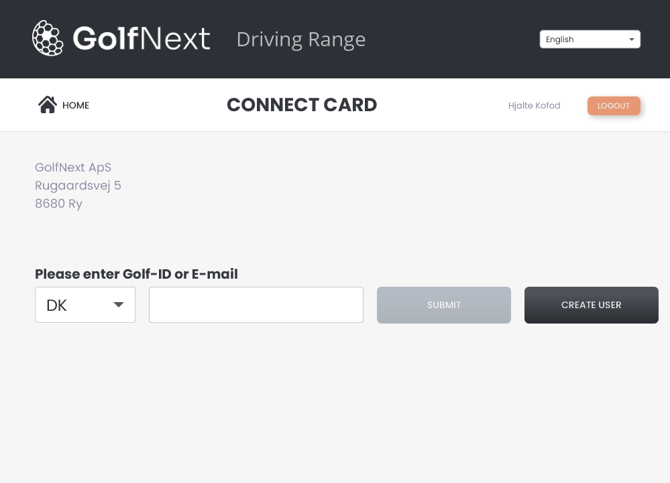
You should now be on this page. If the customer is a member of the Golf Federation, you can enter his Golf ID, or scan his Golf Federation card. Otherwise, press "Create User"
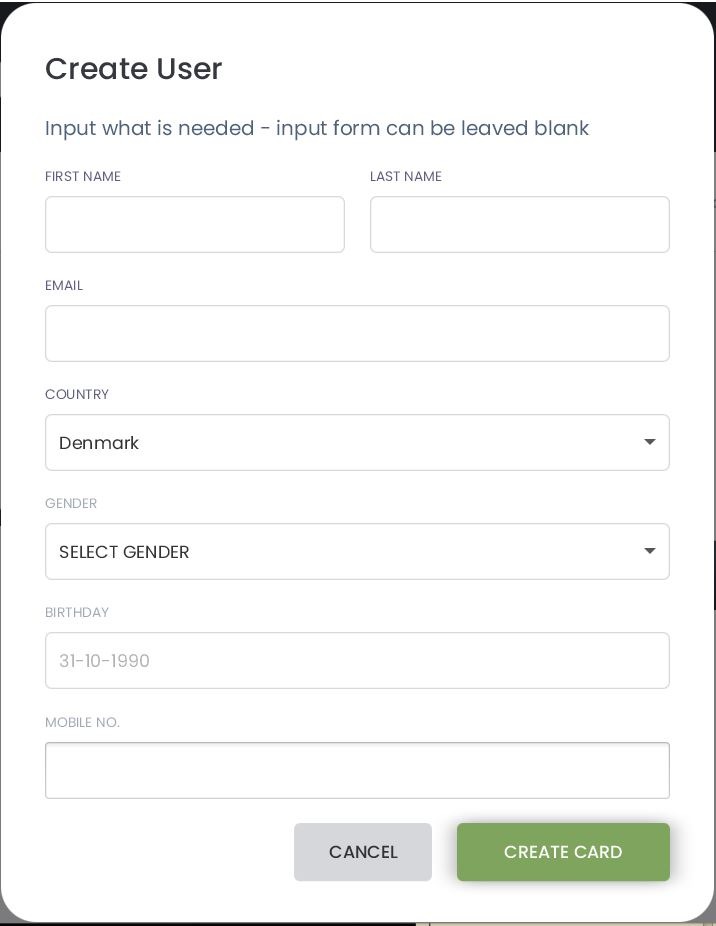
This page can be filled with the customer's information, but otherwise can be left blank if you simply want to issue a new card.
After entering the golf-id or filling in the form shown above, you will be prompted to scan your card.
After you have done so, the card will be attributed to the person whose information you entered, and it should have no money on it. You will be sent to the top-up page, where you can add money to the customer's card.
Thank you for reading - feel free to contact us in case you have any questions, suggestions or general feedback.